
Prayer Times for Windows: User Guide
From your first installation to alerts and appearance: follow the steps, compare the settings with the screenshots, and save your choices.
These are actual screenshots from the app guide, showing the Arabic interface. Details may vary by version and language. Select any image to view it at a larger size.
Get to know the prayer times screen
The screensaver brings together today’s information and the next prayer. This real screenshot illustrates the layout; it is not a timetable for today.
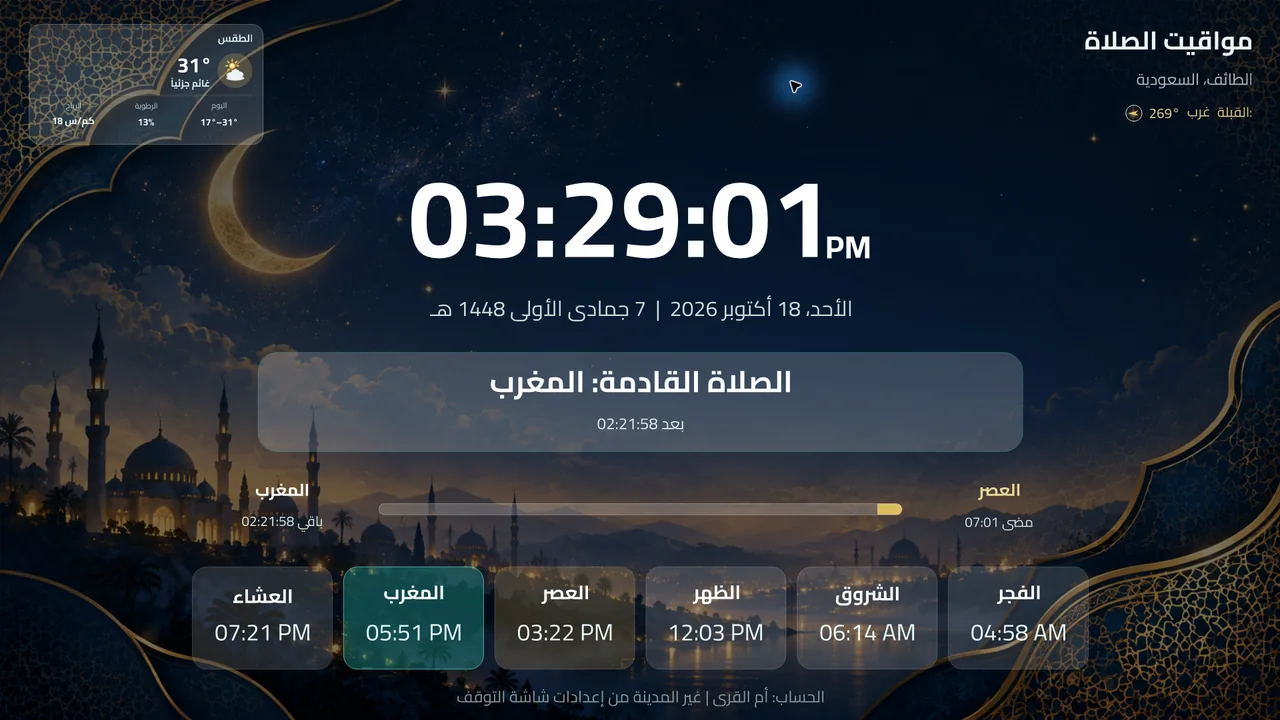
- At the top: your city and Qibla direction, plus weather when enabled and data is available.
- In the middle: the clock, Hijri and Gregorian dates, followed by the next prayer and its countdown.
- At the bottom: today’s prayer time cards, with the next prayer highlighted and a progress indicator between prayers.
1. Download and install for the first time
The app is for 64-bit Windows. Have your city name ready, and an internet connection if you want to select your location on the map.
- Use “Download the latest release” at the end of this guide, wait for the download to finish, then open the installer.
- On the welcome screen, select “Next”, then choose your city and check the location and time zone before continuing.
- Review the alert and start-with-Windows options, and set the idle time before the screensaver starts.
- Review the summary and select “Install”. Windows may request administrator approval to finish.
- When installation finishes, use the prayer times shortcut to open the display and the settings shortcut to customize the app.
2. Set the city and calculation method
Open “Location and calculation” (الموقع والحساب). The location, time zone, and calculation method determine the times shown for your area.
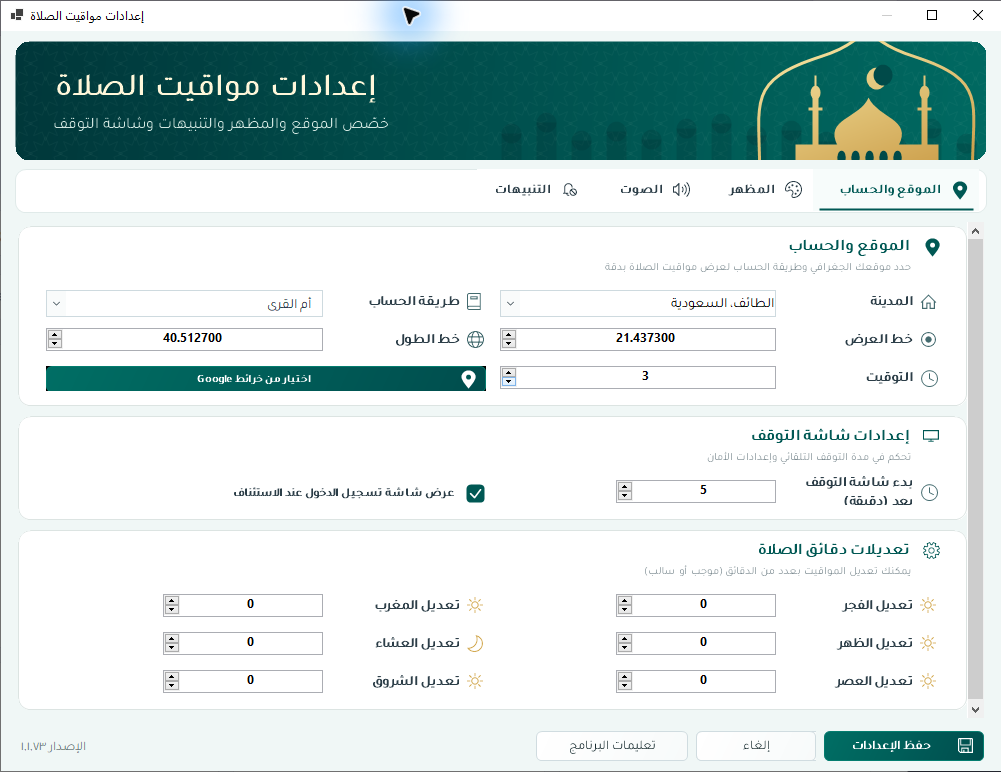
- Choose a city, or select “Choose from Google Maps” and pick your location. Check the latitude and longitude afterwards.
- Check that the time zone matches your area, then choose the calculation method appropriate to your local timetable.
- If needed, use the prayer minute adjustments to add or subtract minutes for each time. Check the location and time zone before changing offsets.
- On the same page, you can set the idle time before the screensaver starts and whether to show the sign-in screen on resume.
- Select “Save settings”, reopen the prayer times screen, and compare the times with your local official timetable.
3. Choose and test prayer sounds
Open “Sound” (الصوت). You can choose a general sound or a separate sound for each prayer.
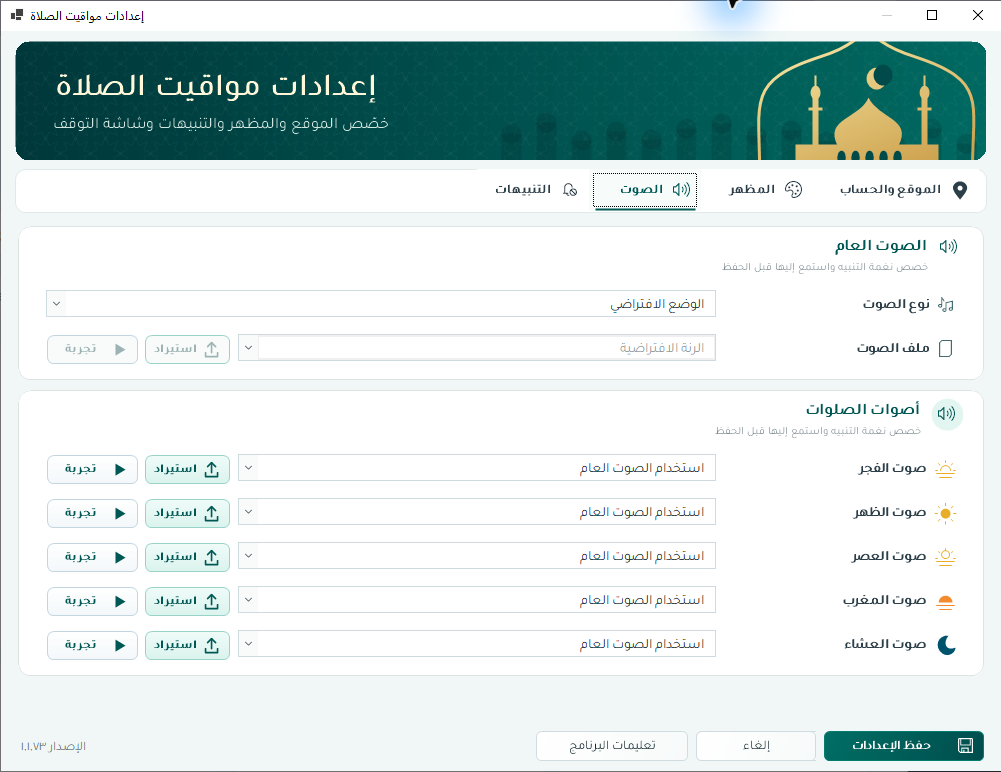
- Under sound type, choose the default mode, a custom audio file, or silent mode if you do not want a general sound.
- For a custom sound, choose an available file or use “Import” to add your own file.
- Under prayer sounds, choose audio for Fajr, Dhuhr, Asr, Maghrib, or Isha. “Use general sound” makes that prayer follow the general setting.
- Select “Test” beside the sound you want to hear, and check Windows volume and the selected output device.
- Select “Save settings”, then use the Alerts tab to enable the prayers you want.
4. Enable alerts and weather
Open “Alerts” (التنبيهات). Selecting audio and enabling a prayer alert are separate settings; check both.
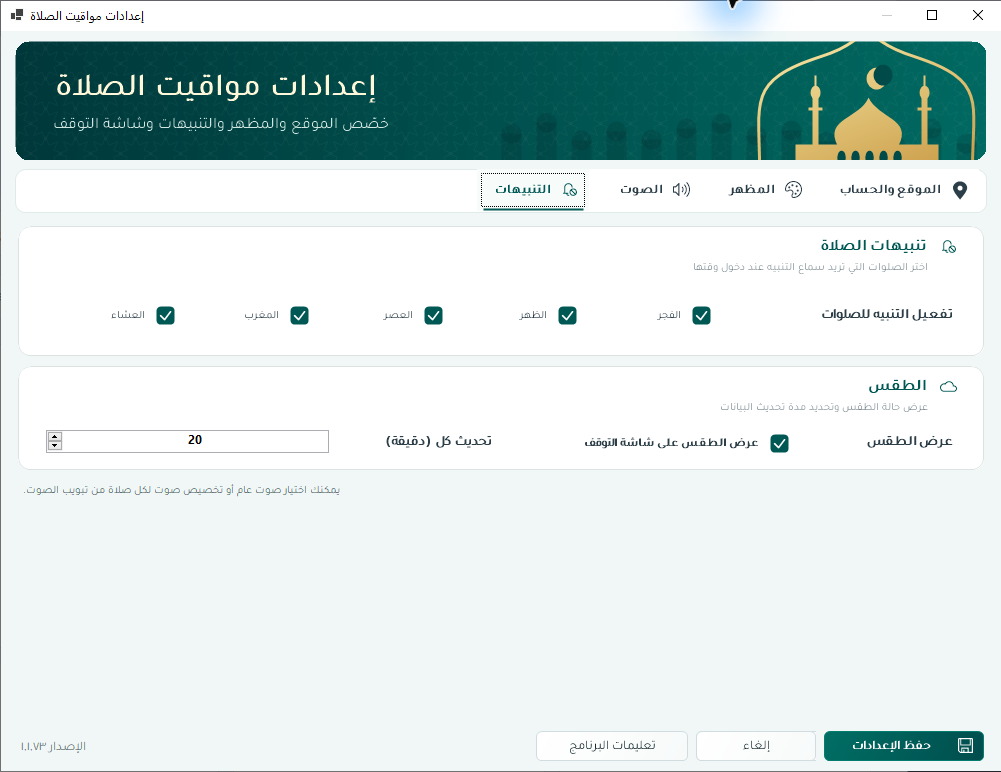
- Check the prayers you want alerts for and uncheck any you do not want.
- For the weather card, enable weather on the screensaver and choose the refresh interval in minutes. Weather data requires internet access.
- Select “Save settings” and keep the monitor running beside the Windows clock so it can deliver alerts.
5. Customize the background and font
Open “Appearance” (المظهر) to make the clock and prayer times comfortable to read on your display.
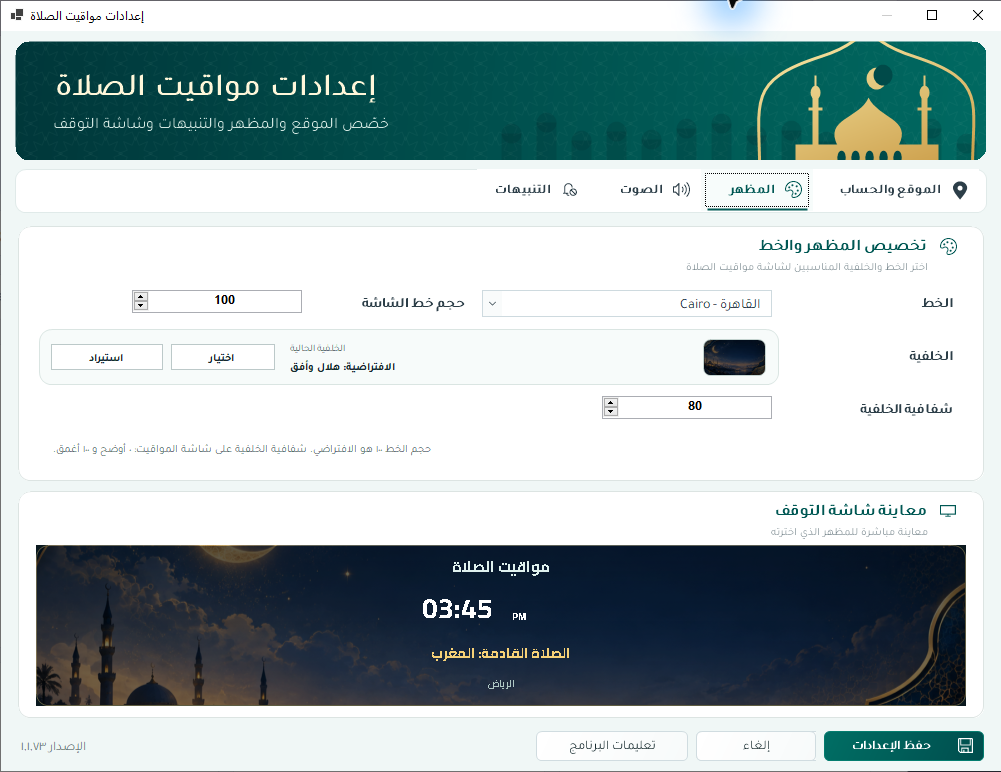
- Choose a font and set its size. The default size is 100; watch the preview as you adjust it.
- Beside the background, select “Choose” to use the built-in library or “Import” to add your own image.
- Adjust background transparency: 0 makes the background clearer, and 100 makes it darker on the prayer times screen.
- Check the screensaver preview to ensure the text is readable over the image, then select “Save settings”.
6. Update the app and open the PDF guide
Prayer times are calculated locally. Maps, weather, and checks for new releases require internet access.
- In releases that include an “Update app” button, open settings and select it while online to check for a newer version.
- The monitor in releases with update support also checks periodically while running and online. Windows may request administrator approval to finish installing an update.
- Use “What’s new?” to review changes, or download the latest installer from the website when needed.
- To open the illustrated guide in the app, select “Program help” at the bottom of settings. A PDF link is also available at the end of this page.
Troubleshooting
The times do not match my city. What should I check?
Check the city, coordinates, time zone and calculation method, then verify the Windows clock and date. Compare with your local official timetable before adjusting minute offsets.
I cannot hear an alert.
Check that the monitor is running and the prayer is enabled in Alerts. Check the general and per-prayer sound settings, use Test, and verify Windows volume and the audio output device.
The screensaver does not start automatically.
Review the idle time under Location and calculation and save your settings. Then check Windows screensaver settings and confirm Prayer Times is selected.
Weather or maps are unavailable.
Check your internet connection. For weather, check that it is enabled in Alerts and your location is set. Unavailable weather data does not mean local prayer time calculation has stopped.
How do I close the display or return to settings?
Press any key or click to close the display. To open settings, use its shortcut or right-click the monitor icon beside the Windows clock and select Settings.
Ready to get started?
Download the app, review release notes, or keep the illustrated PDF guide.